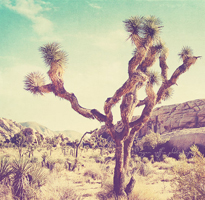
For whatever reason I've got Palm Springs on the brain this week. It's that time of year when we all feel that it should be warm by now, that we deserve a break after everything winter has put us through, and yet the cold days just keep dragging on. Yesterday we were in the 40s in Vermont, whereas Palm Springs had a high of 92.
Call me crazy, but I'm longing for the intense heat of stepping into a car that's been baking in an unshaded spot too long. I'm getting nostalgic about the scent of sunblock and running quickly on a pool deck with bare feet because the ground is just too hot, which brings me to the Ace Hotel & Swim Club. For the past few years I've read review after rave review about the Ace Hotel in Palm Springs, and I've added it to my bucket list to stay there at some point. From what I can gather it's got a retro/boho/mid century vibe, a huge pool, bingo nights, and pets are allowed throughout the hotel, even in the pool area. How fun is that? When Josh and I took a road trip from LA to Arizona last summer, we spent a night in Palm Springs on the way through, and I suggested the Ace. He thought it looked too "hipstery" so I relented, knowing that it should only be experienced with someone who will appreciate the vintage furniture and the west coast vibe. Maybe there's a Palm Springs girls trip in the future....

Wednesday, April 24, 2013




Monday, April 22, 2013
House Projects Update!
It's house project mania around here. I wanted to wait until we had at least one project complete so that for once I could show an "after" picture, but hey, we're still workin' so yet another post about projects in progress will have to do. Here's what we've got going on...
The Bathroom
It's been completely gutted, and Josh is working on putting up the drywall and installing the shower kit as I type. We opted to stay away from the plastic showers you "pop in" and instead are doing a custom tiled shower. It's a ton of work, including pouring cement, grading the floor so the water flows toward the drain, installing water barriers and a curb around the base, cutting tile, grouting, and sealing. You get the picture. My contribution to the bathroom is refinishing the oak cabinet we are using as the sink stand, and refinishing an old flea market mirror to use above the sink. Josh is a good guy, and he has also let me take over the choosing and ordering the fixtures, tile, lighting, etc. We had a nice vessel sink delivered last week that I can't wait to pop on top of the oak cabinet. I'll pull together dedicated posts for those pieces once we have something to show, but in the meantime, here's a small sneak peek of the sink cabinet being refinished (the top was previously painted black):


The Rock Wall
As mentioned last week we are building a rock retaining wall for the kitchen garden next to the house. Building a rock wall by hand is incredibly labor intensive. If we had a tractor to pick up and transport the rocks for us, we'd probably be done by now, but we are literally climbing down into river beds, pulling out rocks by hand, one by one, then lugging them back to the truck bed. One. Rock. At. A. Time. We limit ourselves to a few hours a day doing this, as some of the rocks are a few hundred pounds each, and carrying those around really takes it out of you. On the bright side, I am learning proper lifting form. Squat deep, push through the heels, chest to the sky, lift with your legs! Here's what a typical rock gathering run looks like:

That's all for now! Hope everyone had a great weekend. We are heading to NYC on Thursday to see my dad's band play at Birdland, and I am really looking forward to some time in the city with family and friends. Winter was pretty and all, but I'm ecstatic to finally be able to take a trip and enjoy the warmer temps!
The Bathroom
It's been completely gutted, and Josh is working on putting up the drywall and installing the shower kit as I type. We opted to stay away from the plastic showers you "pop in" and instead are doing a custom tiled shower. It's a ton of work, including pouring cement, grading the floor so the water flows toward the drain, installing water barriers and a curb around the base, cutting tile, grouting, and sealing. You get the picture. My contribution to the bathroom is refinishing the oak cabinet we are using as the sink stand, and refinishing an old flea market mirror to use above the sink. Josh is a good guy, and he has also let me take over the choosing and ordering the fixtures, tile, lighting, etc. We had a nice vessel sink delivered last week that I can't wait to pop on top of the oak cabinet. I'll pull together dedicated posts for those pieces once we have something to show, but in the meantime, here's a small sneak peek of the sink cabinet being refinished (the top was previously painted black):

The Stairs
The stairway leading down to the basement was in rough shape. The stairs were bare, dirty wood, and the walls were covered in dark wood paneling. I sanded and stained the tops of the stairs, and we both worked on painting the kickboards and walls Navajo white. The upper part of the walls will be a light sage green. We also found a new light fixture to replace the current boring one. Here's a small sneak peek at the refinished/painted stairs:
The French Doors
We found a pair of flea market french doors and sanded/painted them to use between the office and bedroom downstairs. We finally hung them yesterday, and while a bit of tweaking on the hinges and knob hardware is still needed to get them to close properly, I'm really liking how they turned out. Considering this wall was previously a weird open closet with pipes running through, this is a big improvement!
That's all for now! Hope everyone had a great weekend. We are heading to NYC on Thursday to see my dad's band play at Birdland, and I am really looking forward to some time in the city with family and friends. Winter was pretty and all, but I'm ecstatic to finally be able to take a trip and enjoy the warmer temps!
Thursday, April 18, 2013
Building a Rock Wall
Last fall we started work on a rock retaining wall nestled into the sloping hillside by our kitchen door. Once the wall has been built, we'll fill in the hillside with dirt and manure to create a level plot for a kitchen garden. Work stopped during the winter, but we are back at it now that spring has arrived, and making slow but steady progress.
We are gathering the rocks by hand from the woods and river beds behind our house, piling them in the back of the truck as we go, then driving them back to the retaining wall site for careful placement on the wall. Every time we complete a round of gathering/placing, we take a step back and realize just how long the process is going to take for a couple of amateurs like us. On the bright side we are really going to appreciate that wall when it's done!
↓ The wall is looking like this right now.
 The nice flat rocks are stacked in the front in a two over one fashion, then the irregular rocks are tossed in the back for more support. Josh has also been digging up sod from a south facing portion of our yard where he plans to plant more food this summer. The dug up sod is being tossed behind the retaining wall to help fill in the hillside. ↓
 ↓ Josh started digging the second gardening plot earlier this week.
 ↓ And by today it looks like this. The plot will be about 80' x 20' when complete.
 ↓ From above the whole mess looks like this.
 The wall will be about 4' tall in the front when complete, and we'll continue it around on the sides of the garden and taper it off toward the top of the hill. At the rate we're going now, which is a few hours every day collecting a placing rocks, we're probably looking at mid-summer before this thing is done.

It will be imperfect and probably lopsided in a few places, but judging from how it's come along so far, I think it is going to look very cool when complete. Can't wait to share the finished pics!
We are gathering the rocks by hand from the woods and river beds behind our house, piling them in the back of the truck as we go, then driving them back to the retaining wall site for careful placement on the wall. Every time we complete a round of gathering/placing, we take a step back and realize just how long the process is going to take for a couple of amateurs like us. On the bright side we are really going to appreciate that wall when it's done!
↓ The wall is looking like this right now.
It will be imperfect and probably lopsided in a few places, but judging from how it's come along so far, I think it is going to look very cool when complete. Can't wait to share the finished pics!
Wednesday, April 17, 2013
Weekly Etsy Wish List: Boston Love
My heart is breaking for Boston this week with the news of the marathon bombings. I lived in Boston for 11 years before moving to Vermont in September, and even after 8 months away, Boston still feels more like home to me than anywhere else. I watched the marathon countless times from that very block, and the condo I still own in the city is a 20 minute walk from the finish line. Josh's brother in law was running in the race this year, and his sister was there to cheer him on. For a little while we didn't know where they were and I couldn't think about much else until I got the call that they were safe. Luckily they were miles away when the bombs went off, and a kind stranger gave them a ride home so they wouldn't be stranded in the mob of people wondering what to do and where to go.
I couldn't help but tear up this morning while listening to stories on the radio of runners who, after hearing about the attacks, ran another two miles to the hospital to donate blood. Stories from runners who say they will be back next year with more friends than ever to run again. As usual, Stephen Colbert summed it up best, saying, "Those maniacs may have tried to make life bad for the people of Boston, but all they can ever do is show just how good those people are." Amen to that!
In honor of my favorite city and one in need of a lot of love and support right now, this week's Etsy Wishlist is a roundup of Boston themed handmade items. Please send positive thoughts out to the people who were affected by this tragedy and the residents of Boston this week. Enjoy the list!
I couldn't help but tear up this morning while listening to stories on the radio of runners who, after hearing about the attacks, ran another two miles to the hospital to donate blood. Stories from runners who say they will be back next year with more friends than ever to run again. As usual, Stephen Colbert summed it up best, saying, "Those maniacs may have tried to make life bad for the people of Boston, but all they can ever do is show just how good those people are." Amen to that!
In honor of my favorite city and one in need of a lot of love and support right now, this week's Etsy Wishlist is a roundup of Boston themed handmade items. Please send positive thoughts out to the people who were affected by this tragedy and the residents of Boston this week. Enjoy the list!


Monday, April 15, 2013
Weaving a Scarf
This week at weaving class I used the same warp thread already on the loom and continued on with a simple scarf. In a typical Claire move, I chose a simple black thread to weave crosswise through the white and blue warp thread, creating the most boring pattern possible. In retrospect I should have picked a brighter color that would provide a little more interest and show up in pictures. Oh well, live and learn! My scarf uses the most basic of plain weave techniques, where I alternated the 1 & 3 then 2 & 4 foot peddles while shooting the weft (crosswise) thread through with the shuttle. My scarf basically looks like what you see below, with the exception of three dark turquoise stripes on each end for some detail.
 ↓ Pressing the peddles, aka treddles.
 ↓ The shuttle sliding through with the blue weft thread.
 ↓ Close up of the blue weft thread carried through by the shuttle.
 ↓ As the weft fills in, the scarf is wrapped around a bar on the bottom of the loom.
 ↓ Using a manual winder to refill the weft thread bobbin (the bobbin sits inside the shuttle).
 ↓ My weaving teacher's goofy Golden, Copper, is there every step of the way to keep us company :)
 ↓ When the weaving was complete for the scarf, we cut it from the loom.

After removing the scarf and sample piece, we sprayed the thread with water. My homework this week is to dry the scarf in the dryer for about 5 minutes, cut the sample from the scarf, then twist and knot the fringe at the ends to create a completed piece. Next week we will start on Navajo rug style weaving, which is what I am really interested in. Progress!
After removing the scarf and sample piece, we sprayed the thread with water. My homework this week is to dry the scarf in the dryer for about 5 minutes, cut the sample from the scarf, then twist and knot the fringe at the ends to create a completed piece. Next week we will start on Navajo rug style weaving, which is what I am really interested in. Progress!
Sunday, April 14, 2013
Around Town in April
On our way to Home Depot today I pulled over half a dozen times to snap pictures of old barns, hay fields, and general scenery along the way. Yesterday everything was covered in snow, but temps reached 50 today for the second time in a few weeks we could see bare ground and grass. I can't tell you how happy I will be when that grass turns green and we see leaves on the trees again!
Our neighbors have a beautiful covered bridge that crosses a brook at the bottom of our road and leads to a barn housing a donkey and a zebra. Yep, you heard right. They have a zebra.

Huge red barn down the street.
 A stream with minty green water (I couldn't capture the color accurately on camera) runs through the center of our town.
 Beautiful valley on the south side of town.

Dilapidated barns are a dime a dozen around here.
 Hay bales.
 You can never have too much cord wood.

Our neighbors have a beautiful covered bridge that crosses a brook at the bottom of our road and leads to a barn housing a donkey and a zebra. Yep, you heard right. They have a zebra.

Huge red barn down the street.


Dilapidated barns are a dime a dozen around here.


Wednesday, April 10, 2013
Weekly Etsy Wish List: Our Wedding
I realize that in saying this I sound like the grinch of all grinches, but I'm not a big one for weddings. I don't know why, but I just never got swept away in it. I never dreamed about my wedding day, never planned what colors I would have or looked at bridal magazines. The only thing I really knew is that I don't want a big production.
After Josh & I got engaged last spring the inevitable questions started to come. Have you set a date? Did you buy a dress? Are you registered somewhere? For the past year my my answer has always been, "Nope!" Eventually, though, we had to get down to brass tacks, and a few of the details are starting to come together. Here's what we've planned so far: Our wedding is going to be incredibly small, with immediate family and one close friend each. We'll stand under the old apple tree in our yard and Josh's grandmother will marry us right there. I'll wear a plain white dress made by my friend Marie. Josh will build some picnic tables and a pergola next to our fire pit in the yard for the reception/dinner. We'll decorate with flowers from the yard. I am hoping for roasted marshmallows around the fire pit after dinner. We don't have a registry, but will set up a charity donation with Heifer International in lieu of gifts. I don't want fancy pots and pans or new dishes, I'd rather buy them myself at the thrift store for $2 and save trash from going in the landfill.
Now that we've got some details narrowed down I've made a Pinterest board for inspiration and today I've gathered together a group of items on Etsy that I think capture the spirit of what we are trying to achieve. I was worried that the wedding might take on a life of its own and eventually I'd throw my hands up and ask Josh if we could just elope, but I am actually starting to get excited about a few of the things we've planned. Maybe it won't be so bad after all ;-)
After Josh & I got engaged last spring the inevitable questions started to come. Have you set a date? Did you buy a dress? Are you registered somewhere? For the past year my my answer has always been, "Nope!" Eventually, though, we had to get down to brass tacks, and a few of the details are starting to come together. Here's what we've planned so far: Our wedding is going to be incredibly small, with immediate family and one close friend each. We'll stand under the old apple tree in our yard and Josh's grandmother will marry us right there. I'll wear a plain white dress made by my friend Marie. Josh will build some picnic tables and a pergola next to our fire pit in the yard for the reception/dinner. We'll decorate with flowers from the yard. I am hoping for roasted marshmallows around the fire pit after dinner. We don't have a registry, but will set up a charity donation with Heifer International in lieu of gifts. I don't want fancy pots and pans or new dishes, I'd rather buy them myself at the thrift store for $2 and save trash from going in the landfill.
Now that we've got some details narrowed down I've made a Pinterest board for inspiration and today I've gathered together a group of items on Etsy that I think capture the spirit of what we are trying to achieve. I was worried that the wedding might take on a life of its own and eventually I'd throw my hands up and ask Josh if we could just elope, but I am actually starting to get excited about a few of the things we've planned. Maybe it won't be so bad after all ;-)
 |
 |
 |
| White Evelyn Dress, $160 | Apple Tree Photo, $30 | String Lights, $224 |
| . | . | . |
 |
 |
 |
| Barn Photograph, $25 | Wine Barrel, $65 | Blue Ball Jar, $8 |
| . | . | . |
 |
 |
 |
| Pergola, $3,000 | Wedding Sign, $76 | Reclaimed Wood Tables, $850 |
Subscribe to:
Posts
(
Atom
)