

For months I've been planning to make a neutral background wall with weathered wood table base to use for my shop photos, and this week we finally finished the display.
The new product photo setup includes:
1) A large wall on a rolling base for the background
2) An old weathered barn door attached to rolling wood beam table legs for the base
3) A large sheet of drywall leaned up against the left side of the display to reflect light coming from the window on the right back into the setup.
The large wall background will allow me to photograph larger items easily (maps, rugs, etc.) and the rolling base means I can move the setup around the workshop to capture the best natural light. The long wood table will be pushed against the wall to provide the base surface for the photographs, and the wheels allow it to move with the wall around the room. Here's how we built the wall and table (please excuse my fuzzy iPhone snapshots):
The Background Wall
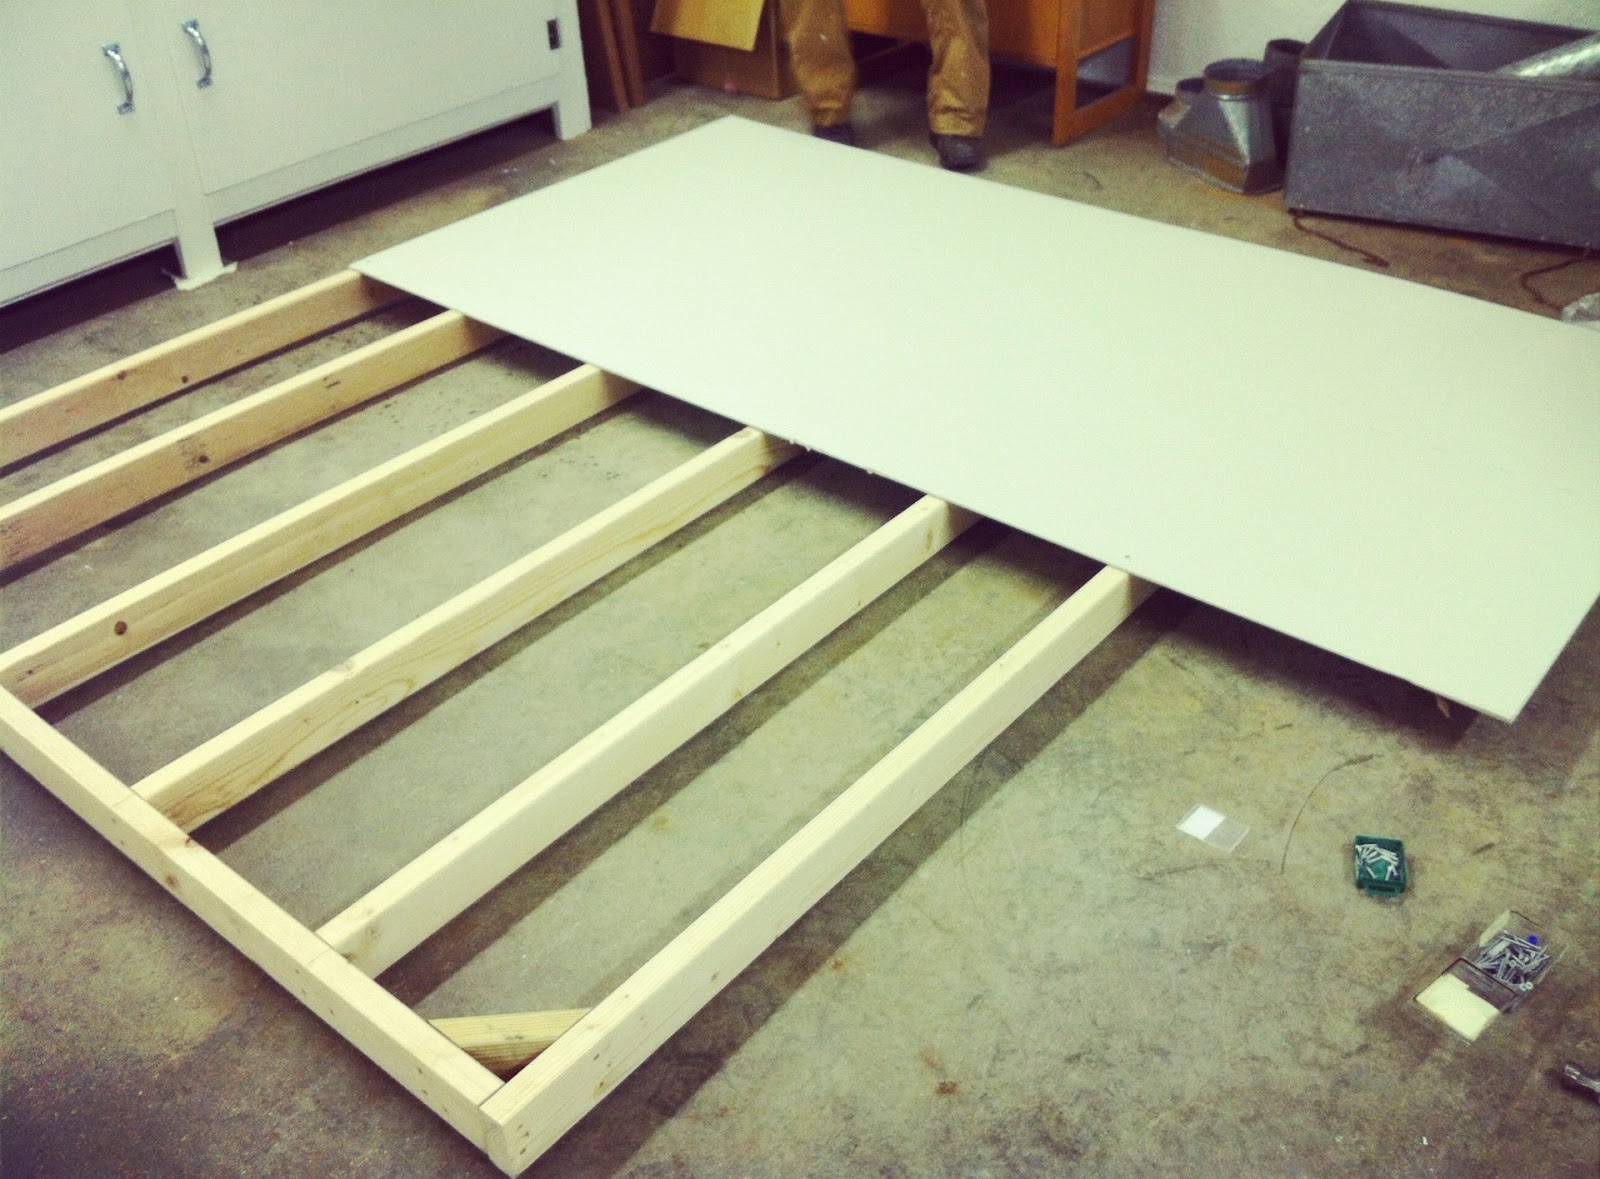
First, we built the frame for the wall with 2x4s.
Then we screwed two pieces of drywall to the frame and cut off the edges that ran over the side of the frame.
Once both pieces of drywall were attached, we set to work making the rolling base using heavy pieces of salvaged wood from the burn pile at the dump. We added 6 wheels to the bottom to allow the base and wall to roll around the room.

Next, we attached the framed wall to the base.

And finally I mudded the drywall seam and screw holes, then painted the whole thing a neutral color.

The Table
I searched high and low until I found a weathered old barn door with just the right amount of wear, then removed the hinges, door handle, and latch hardware.
We cut a 4" x 4" wood beam from Home Depot into 4 sections for the legs, and attached them to the barn door with brackets and corner braces

Wheels were added to the bottom of the legs, then I gave the legs a coat of neutral paint.

And there you have it!

Now that the display has been built, I'll be rephotographing my existing shop stock with the new setup in addition to taking first time photos of the new items I've acquired over the past 4 months. In total, I have about 120 items to photograph so it will take me a while to get through them all. I will probably reopen the shop with about 20-30 items and continue photographing and listing over time. Once Thanksgiving is over (we're hosting both Josh & my family this year), I'm heading straight to the barn to work on photos!
I thank you for this..so simple but clever. I have popped over here from Etsy..I can't thank you enough for the great post. So many articles are written about photographing jewelery and small things..mine are larger, have been having a time trying to have my pieces look great and still give a cohesive feel to my shop.
ReplyDeleteWishing you all the best, Brenda
Cattails Woodwork
This comment has been removed by the author.
ReplyDeleteThis is a great alternative to a lightbox which is what I've been using. Time to hit my workshop over the weekend and make one! Glad to see others doing vintage like me!
ReplyDeleteScott Caplan
http://www.etsy.com/store/Steamcrunk
Zenbeer - thanks for the comment. Your etsy shop is cool! If you get around to making a new setup I'd love to see it when it's done. Good luck!
ReplyDeleteBrenda - Glad this can be of some help! The nice thing about it is that it can be replicated at any size to fit your needs. Just checked out your shop as well. I think your photos are great & your items are absolutely beautiful. Good luck!
Fabulous idea. So far I've been relying on natural light from my galley kitchen window (seems to be the only spot where colours photograph accurately), but would love to build a micro-scale version of your set up. Thanks for the inspiration!
ReplyDeleteThis is SUCH a great idea. just gotta scale it down for my teeny tiny space... right now i'm using a large 14"x14" hardcover book and bristol board reflector, with a tissue paper diffuser for my desk lamps, since i tend to work at weird hours of the day...
ReplyDeletegotta bookmark this one!! :D
Tiffany Rose
http://www.etsy.com/store/frozenrosedesign
Fantastic ...but how important the help from your fiance in this work...isn't it??
ReplyDeleteMy husband only can play chess with his hands..lol
I'm linen artisan and I realize photos are important of course..but right now I'm doing a very white 'wall' to hang curtains for pictures...in Ireland there is not so much light ..better catch your idea and achieve little more !
I've been relying on natural light from my kitchen window as well !!
https://www.etsy.com/shop/linenartisan?ref=si_shop
I love what you've done with the photography! Such fun items definitely need beautiful representation. Thanks for sharing this - you've sparked some clever ideas for us here too!
ReplyDeleteOh my gosh, I just love everything you have done, the big leap to the country, the job, all of it! I just said "I need a job with more meaning" and the next thing I open is your article on Etsy. I wish you continued success, I'll be your new blog follower and a shopper ;)
ReplyDeleteSue Thomas
The Collected Cottage
Thank you for taking the time to show your photography hints. My husband and I struggle with making good photos. My shop is all about color, and I use a neutral, pastel, or bold color for photographs. I have about 12 colors of fabric and choose the background that best accentuates the piece. We have found that lighting along with the background colors are what is important in the photos of my vintage jewelry.
ReplyDeleteBest regards,
Lee Ann Mills
Colors of the Seasons
This comment has been removed by a blog administrator.
ReplyDeleteThis comment has been removed by a blog administrator.
ReplyDeleteWhat a wonderful set up. I long for that kind of space. I have struggled with my photos in both my shops. I want them to pop! I'm using a digital camera & tend to do a lot of highlighting thru PicMonkey. So wishing I could cut time by shooting great photos that need less editing. Any secrets there? thank you, dahlila DahlilaFound, etsy.
ReplyDeleteHi Dahilia, thanks for your note! I am not a professional so take my advice with a grain of salt, but what has worked the best for me is to find a spot with natural light coming at the object from the side. Use a simple background, and then place a large white board (could be poster board from the craft store) on the opposite side of the setup, facing the window. This board will serve to bounce light back into the setup so you will get more even lighting in your shot (as opposed to lots of light on the side closest to the window and dark shadows on the opposite side) and need to do less editing later. Hope that helps!
ReplyDeleteSO HELPFUL! Thanks so much for sharing!!
ReplyDeleteAny other tips and how-to advice I can find on making my Etsy shop better, I greatly appreciate. Thanks for sharing your set-up! Your shop (and pictures) are just lovely. Keep it up! :)
ReplyDeleteClaire, thank you for sharing your tips on photographing item but I am still lost on how to do it. Also,what color of neutral paint did you use? Thanks so much. Courtney
ReplyDeleteHi Courtney -- feel free to contact me directly via the contact page on my blog and I'd be happy to answer specific questions and give you more details. Thanks!
ReplyDeleteStopping by from the Quit Your Day Job feature on Etsy! I'm from NH so I'm in love with your story! I adore your barn and your clever photography setup and will be reading more of your great blog!
ReplyDeleteBrittany
www.foxburrowvintage.etsy.com
Welcome to Vermont from a 3rd generation VTer who started an Etsy shop several months ago. Wonderful to see your journey and great progress.
ReplyDeleteLeslie
http://www.etsy.com/shop/FryDay
Persuasive is all that is in this blog and Astonishing and absolutely charming!
ReplyDeletebest-dog-leg-braces